
This vegan lemon meringue pie uses a creamy tofu filling and a fluffy aquafaba meringue!

I’ve tried making this pie before. Because ever since I found out you can make billowy, fluffy, snow-white, honest-to-marshmallow MERINGUE from aquafaba (aka the magical chickpea brine), lemon meringue pie has obviously been on my to-do list. (Even though I’ve never really been a huge lemon meringue fan.) (It still had to be done.)
Does this pie taste vegan?
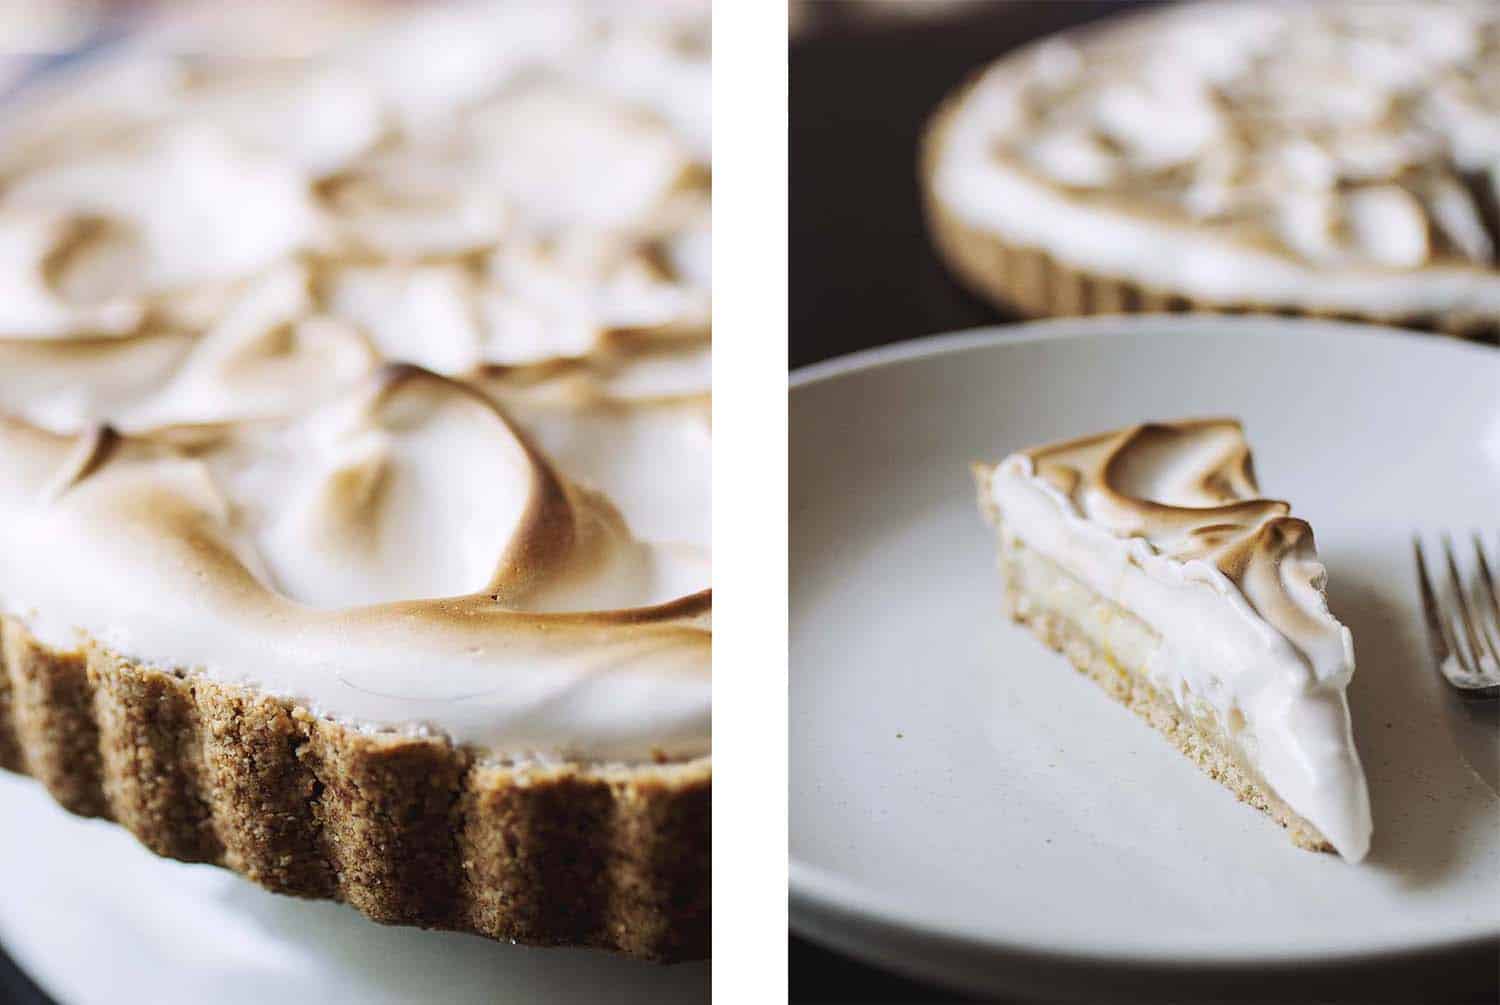
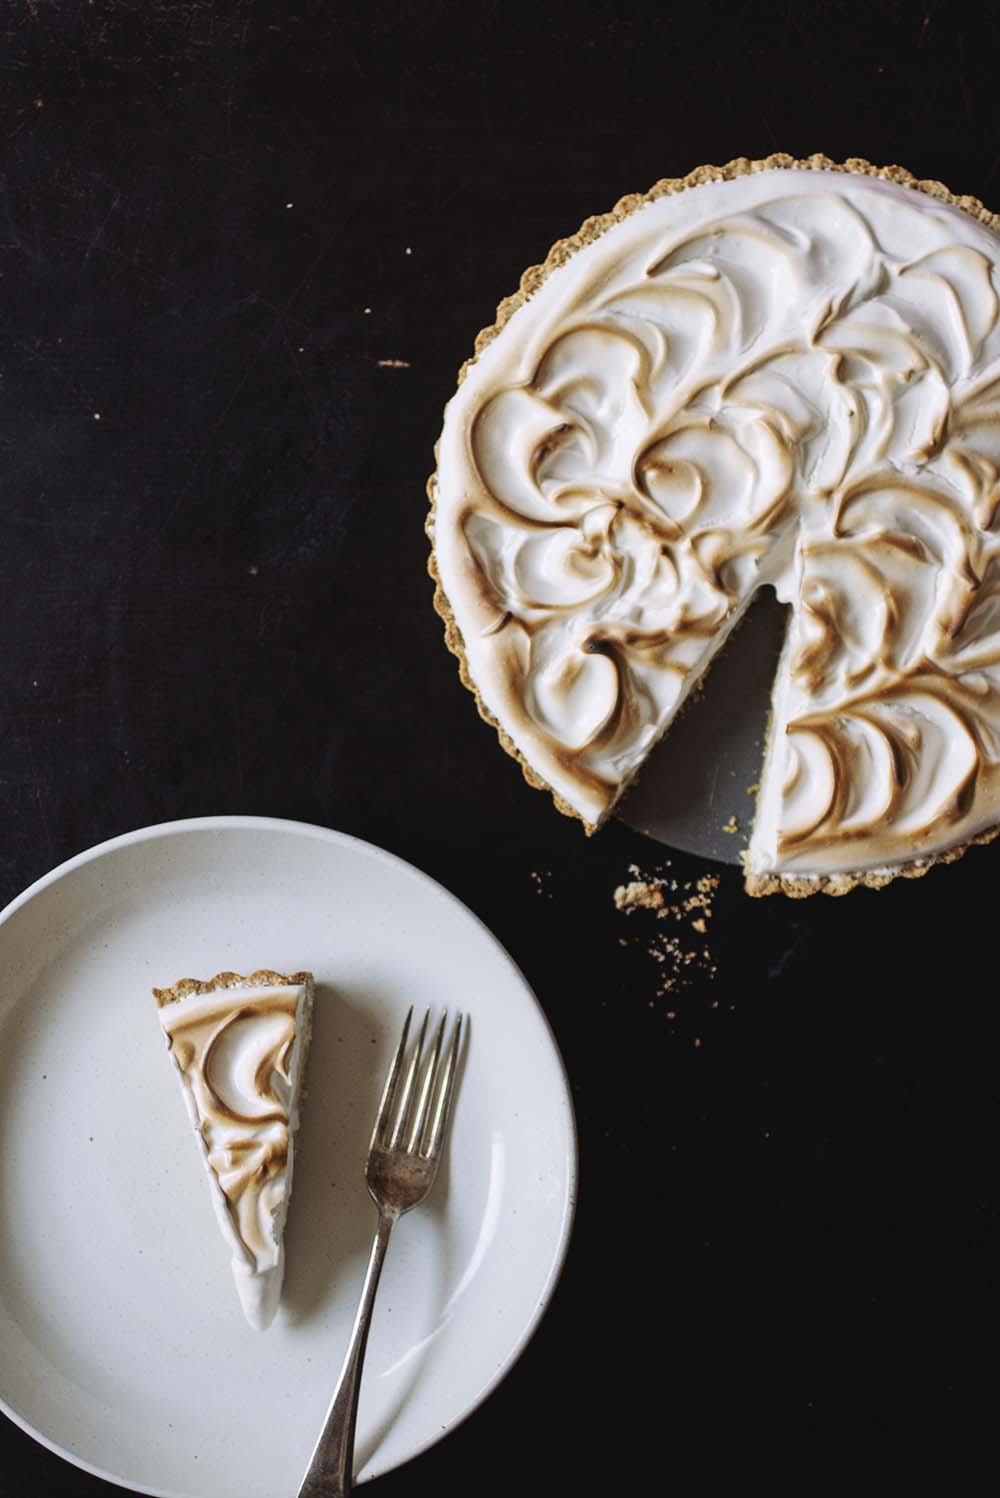
To me, the satiny, glossy, lightly toasted and sticky meringue tastes just like the real deal. The tofu-based filling definitely tastes more like tofu than a traditional lemon curd. If you go in with expectations for a milkier, lightly lemony custard layer, you might be pleased.
The crust is thick, hefty and nutty and stands up to the creamy topping and filling well. Overall, this pie had a somewhat healthy-tasting quality that I found strangely addicting. Even though it wasn’t the most amazing lemon meringue pie rendition I’ve ever had, I couldn’t stop eating it. The fact that the filling has way more protein and less fat and sugar than a traditional lemon meringue pie may have helped!
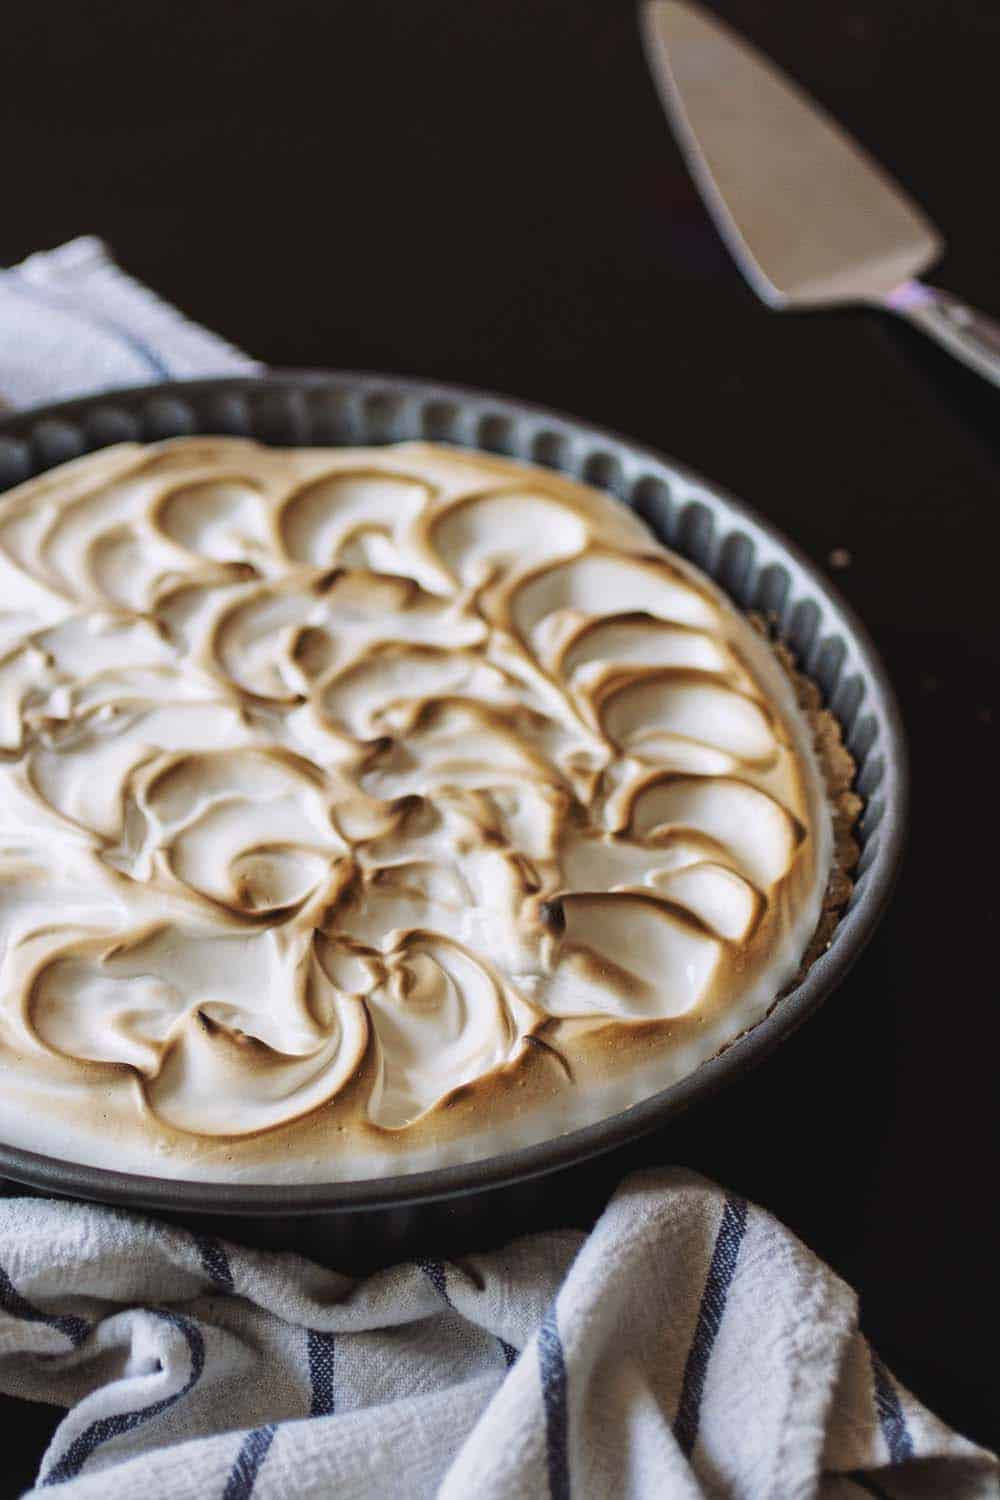
Although this was technically made in a 9″ tart pan, you could also make this in a deep-dish pie pan to make it an actual pie.
A note about aquafaba
While you can make aquafaba meringue using chickpea brine straight from the can (alternatively, some have had success using the liquid from boiling dry beans), I find that reducing the aquafaba first makes for a stronger, stiffer meringue that is less likely to weep and disintegrate into foam after sitting in the fridge. However, you can skip this step if you’re in a rush.
If you’re looking for more recipes with aquafaba, I’ve also used it successfully as an egg replacer in these aquafaba waffles and these vegan pumpkin cookies!
Aquafaba Lemon Meringue Pie (vegan, gf)
Ingredients
Meringue:
- Brine from 1 15-oz can chickpeas about 3/4 cup
- ¼ teaspoon cream of tartar
- ¼ teaspoon vanilla
- ½ cup sugar
Crust:
- 1.5 cups of oat flour
- ¾ cup almond flour
- 2 tablespoons sugar
- ¼ teaspoon salt
- 3 tablespoons coconut oil
- 3 tablespoons almond milk
Filling:
- 14 oz silken tofu
- ¾ cup lemon juice juice of ~4 large lemons
- ½ cup sugar
- 4 tablespoons cornstarch
- 3 tablespoons almond milk
- ¼ teaspoon salt
- 2 tablespoons lemon zest optional
Instructions
Prepare the aquafaba:
- Bring chickpea brine to a boil over medium-high heat. Lower heat to medium and simmer for 15 minutes. Mixture should be reduced to a little under half a cup at this point (it’s okay if it isn’t exact). Pour reduced brine into a cup and refrigerate while making the crust and filling.
Make the crust:
- In a food processor, combine the oat flour, almond meal, sugar and salt until blended. Slowly stream in the coconut oil and milk until evenly incorporated. Alternatively, mix the dry ingredients together by hand, then work in the wet ingredients until dough holds together when pressed (mixture will be crumbly). Press evenly into a 9 or 10” tart pan or deep dish pie pan, prick all over with a fork, and bake for 20-25 minutes at 350 degrees, until crust is dry and starting to turn golden.
Make the filling:
- Blend all ingredients (tofu through salt) together in a blender or food processor.
- When the crust is done baking, let stand or refrigerate for about 10 minutes, or until barely warm. Pour filling into crust and bake for 40-45 minutes at 350 degrees until filling is set, but still slightly jiggly. Let cool while making the meringue.
Make the meringue:
- Whip the cold, reduced brine in a clean bowl with clean beaters with the cream of tartar and vanilla until mixture turns foamy, and then begins to form soft peaks. At this point, slowly add the sugar a quarter cup at a time. Continue to whip the mixture until it reaches stiff peaks.
Assemble:
- Cover the top of the cooled pie with the meringue. Preheat the broiler to 575 and broil for 1-2 minutes, keeping an eye on the pie the entire time–it can burn in a second!

Nora Taylor
Oh my goodness I love how pretty it looks! Lemon Meringue Pie used to be one of my favorite desserts pre-vegan. I thought I’d never be able to indulge again! I love aquafaba, I’ve been experimenting with it a lot lately.
erika
Thanks so much Nora!! Aquafaba is so amazing–I hope you get to indulge in lemon meringue pie again soon!! 🙂
Jessica
Hi Erika,
thank you for this inspiring pie recipe I tried yesterday. The Meringue looked perfect when I covered the cold cake. Unfortunately the Meringue broke down when I put it back in the oven to bake? It was like a liquid? Do you have an idea why that happened?
thanks from germany
Jacqueline d'Estries
I had a couple of those pre-made pie crusts in my pantry I needed to use before they expired so I Googled Aquafaba Pie and this is the first one that came up. The recipe was enough to fill both of those Keebler little graham cracker crusts so I’m glad I didn’t double it! I brought the pies to my family’s 4th of July picnic and they were a huge hit! So delicious! I could sit and eat them all in one sitting! I would make it again in a heartbeat. I can’t wait to try more aquafaba pies. Thank you so much for the recipe!
erika
Jacqueline!! Thank you so much for leaving this lovely comment, I’m so glad you and your family enjoyed the pies! Isn’t the aquafaba meringue wild?? I love the idea of putting the pie filling in a graham cracker crust. Genius <33
Lisa @ Healthy Nibbles & Bits
Erika, I absolutely LOOOOOVE this meringue pie! I’ve seen some recipes using aquafaba before, but I’ve never played with it in my kitchen. And this is tofu based?? ,Seriously, I am so inspired by this recipe! Erika, thanks again for your sweet words about my photography, but your’s ROCKS! I know Sarah will love this!
Alanna
It’s the stuffffff! I was so excited to see the aquafaba in action when I saw what you were making, and I’m not disappointed! This is so stunning Erika – it looks perfectly satiny and meringue-y, and I’m enthralled with your swirl technique. And I think the crust looks crazy delicious. <3
Gena
I haven’t yet caught the acquafaba bug, but this post may have changed my mind! What an incredible vegan dessert.
erika
Thank you so much, Gena, what a huge compliment coming from you! I’ve been a huge fan of Choosing Raw (or should I say The Full Helping) for ages <333 I hope you get the chance to try (and love) aquafaba soon!!
Heather Mason
woa, I can’t believe that meringue is f rom chickpea brine! Crazy!! This pie looks awesome! I love swirling merengue!! Happy baby shower Sarah!
Traci | Vanilla And Bean
What fun meeting Sarah at a blogger gathering! Bangs and glasses – so cute. And yes, she is Superwoman! So much skill and smarts! Now this pie, Erika! I’m blown away! Aquafaba.. I’ve heard of it, but have never whipped it up, so I appreciate your notes. You swirls look like the eggy deal – beautiful work my dear!
Sarah @ SnixyKitchen
Woah! I’ve never heard of aquafaba and now I’m feeling like I need to rush to the kitchen to experiment. Also – your meringue swirl game is ridiculous. Thank you for the sweet sweet things you wrote (blushing…) and for making such a creatively unique recipe for my cheesebabyshower! I can’t wait until you’re back in the bay and we can dine together again.
Karen @ The Food Charlatan
Dude. I have never even HEARD of aquafaba. You create the most amazing food with such different ingredients Erika!!! The swirls on your meringue are unreal. Mine always look like cat poop. haha! You win!
Shikha @ Shikha la mode
AHHHH I’m so sad I keep missing you when you visit! Can we not do this the next time pls??
Betty
The minute you sneak peeked this on instagram I couldn’t wait for it to be posted, and then I realized it was for #cheesebabyshower!!! This is so lovely, and yes, aren’t Sarah and Alanna so warm and welcoming??? I love this so much Erika!! Please send me a slice 🙂
erika
Aww you’re so sweet, thanks Betty!! They are THE BEST. Can we all hang out someday in the bay?!
valentina | sweet kabocha
I’ve tried to make chickpea brine meringue, but it simply melted in the oven. I really should retry because this tart seems perfect!
Erica
I LOVEEEEEE that you made meringue with the chickpea juice!!! So creative. And it’s so pretty too, the swirls are too perfect <3
laurasmess
This is like MAGIC, I cannot believe that gorgeous meringue was made from chickpea brine! It’s beautiful; creamy and glossy, just like the real deal. I love this post Erika, not just because of your beautiful recipe but because of the warmth and generosity that comes through blogger friendships. Sarah (and her little cheesy bun in the oven) sounds like a beautiful person – I feel like her little one is going to be one lucky (and well fed!) baby. Gorgeous post xx
Rena
Just made this for Thanksgiving. It’s going to becWONDERFUL tomorrow. I know this from generous licking of bowls, spatulas etc. The aquafaba turned out beautiful tho I burned it a tad. I just pulled off the offending layer, made more peaks and started again with a keener eye to time WAY less than what you recommended. Can’t wait to try it all together tomorrow Thank you.
erika
Yay!!! So glad to hear this worked out well for you–do you have any pics of the final product you can share?! And yes, always good to keep a close eye while broiling–mine could be on the weak side because it does take around a minute to brown, but I’ll edit the recipe to tell people to start checking after 30 seconds. Thanks for reporting back Rena!